How Skaffold Simplified the Kubernetes Deployment Workflow?
At our company, we specialize in creating solutions that simplify complex processes and improve operational efficiency for our clients. By leveraging automation tools like Skaffold and modern development practices, we enable businesses to become more agile and scalable. Recently, we tackled a unique challenge faced by a client whose Kubernetes application deployment process was cumbersome and time-consuming.
The client’s development team struggled with frequent manual configurations, long build times, and inconsistencies between local development and production environments. These issues slowed down their release cycle and introduced deployment errors.
To resolve this, we introduced Skaffold, an open-source tool that automates Kubernetes workflows and ensures a seamless development experience. By implementing Skaffold, we eliminated manual intervention, reduced build times, and ensured a consistent deployment experience across all environments.
In this post, we’ll explain the problem, how we solved it using Skaffold, and the benefits our client gained from this approach.
Problem Statement
Our client’s development team faced several challenges in their Kubernetes-based deployment workflow:
- Manual Build & Deployment: Every time a developer made changes, they had to build the container image manually, push it to a container registry, update Kubernetes manifests, and redeploy the application.
- Slow Feedback Loop: Due to these manual steps, developers had to wait for long build times before testing their changes.
- Environment Inconsistencies: The local development environment often differed from staging and production, leading to unexpected issues when deploying code.
- Complex CI/CD Integration: The client wanted a way to seamlessly integrate their development workflow with CI/CD pipelines.
With these issues, the development cycle was inefficient, leading to delays and frustration among the developers.
Our Solution
After analyzing the client’s pain points, we proposed using Skaffold, an open-source command-line tool designed to automate Kubernetes development workflows. Skaffold offered the following benefits:
- Automated Builds & Deployments: Skaffold continuously watches for changes in the source code and automatically builds and deploys updated containers.
- Faster Iteration: By enabling hot reloading and incremental builds, developers could instantly see their changes without manually pushing images.
- Consistent Environments: Skaffold ensures the same workflow for local, staging, and production environments, reducing deployment inconsistencies.
- Seamless CI/CD Integration: Skaffold integrates well with popular CI/CD pipelines, making automated deployments much easier.
By leveraging Skaffold, we simplified the deployment process, minimized manual steps, and improved developer productivity.
Implementation
To integrate it into the client’s workflow, we followed these steps:
Prerequisites
Before starting, ensure you have the following:
- A running and configured Kubernetes cluster (Minikube, Kind, or a cloud-managed cluster like GKE, EKS, or AKS).
- Kubectl is installed and configured to access the cluster.
- Docker is installed for building container images.
- Google Container Registry (GCR) or any other container registry for storing images.
Step 1: Install Skaffold
Developers installed Skaffold on their local machines using the following command:
curl -Lo skaffold https://storage.googleapis.com/skaffold/releases/latest/skaffold-linux-amd64
chmod +x skaffold
sudo mv skaffold /usr/local/bin
Step 2: Create a Skaffold Configuration File
We created a skaffold.yaml file in the project root to define the build and deployment workflow. While our implementation used a Docker-based approach, Skaffold also supports Buildpacks as an alternative method for building images without needing a Dockerfile.
Docker-based Configuration
apiVersion: skaffold/v2beta29  # Version of Skaffold config
kind: Config                   # Type of configuration

build:                         # Section that defines how images should be built
  artifacts:
    - image: gcr.io/my-project/my-app  # Final image name with registry
      context: .                       # Build context (usually project root)
      docker:                          # Use Dockerfile-based build
        dockerfile: Dockerfile         # Name of Dockerfile to use

  tagPolicy:
    sha256: {}                         # Adds a unique tag (based on image hash) to avoid caching issues

deploy:                                # Section that defines how to deploy the app
  kubectl:
    manifests:
      - k8s/deployment.yaml            # Path to Kubernetes manifests to apply
🔍 What it does:
Skaffold builds the Docker image using the specified Dockerfile, tags it with a SHA, and deploys it to the Kubernetes cluster using kubectl.
Buildpacks-based Configuration (Alternative Approach)
This approach lets you build container images without a Dockerfile, using Cloud Native Buildpacks.
apiVersion: skaffold/v4beta11        # Newer config version with Buildpacks support
kind: Config
metadata:
  name: buildpacks-node-tutorial     # Optional metadata name for your config

build:
  artifacts:
    - image: skaffold-buildpacks-node   # Target image name
      buildpacks:                       # Use Buildpacks instead of Docker
        builder: gcr.io/buildpacks/builder:v1  # Builder image from GCP Buildpacks

manifests:
  rawYaml:
    - k8s/web.yaml                     # Application manifest
    - k8s/prod.yaml                    # Production environment manifest
🔍 What it does:
This configuration builds your app using Buildpacks (detecting your app type automatically) and deploys using raw Kubernetes YAML manifests. It’s ideal if you want to skip writing a Dockerfile.
Step 3: Run Skaffold for Development
Developers could now start their development workflow by running:
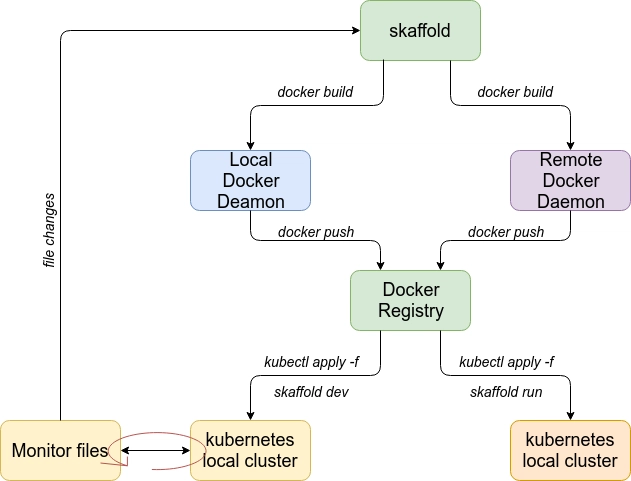
skaffold devThis command:
- Watches for file changes
- Rebuilds the Docker image
- Pushes it to the registry
- Applies updated Kubernetes manifests
Skaffold uses your local kubectl context to interact with the Kubernetes cluster.
Step 4: Integrate Skaffold with CI/CD
To enable automated deployments, we added Skaffold to the client’s CI/CD pipeline:
skaffold run --profile productionThis command ensures the latest changes are built and deployed to the production environment.
Step 5: Verify and Optimize
We tested the deployment to confirm faster feedback loops and smooth rollouts. Additionally, we optimized Skaffold configurations to speed up incremental builds and improve efficiency.
Benefits
By integrating Skaffold into the client’s development workflow, we achieved the following improvements:
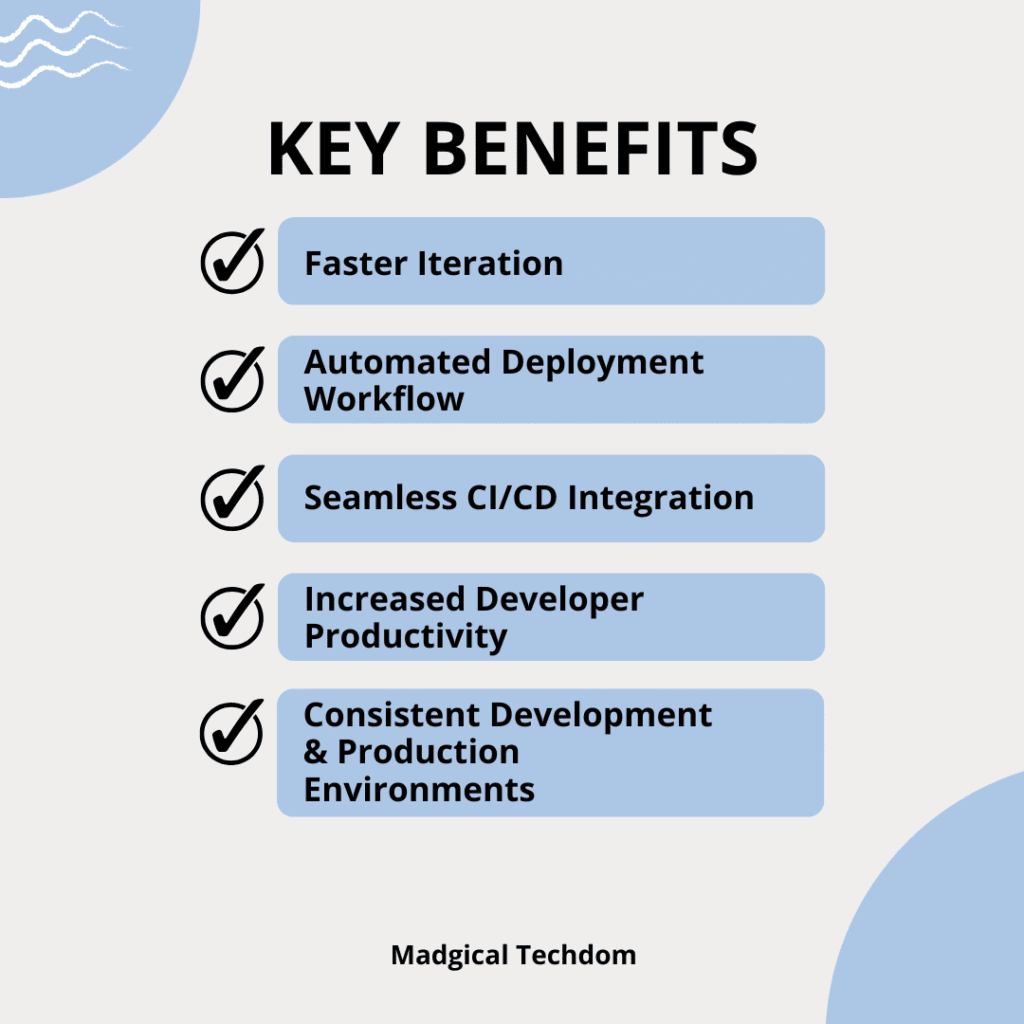
- ✅ Faster Iterations: Reduced build and deployment times, allowing developers to test changes quickly.
- ✅ Automated Deployment Workflow: Eliminated the need for manual build and deployment steps.
- ✅ Seamless CI/CD Integration: Enabled smooth deployment pipelines with minimal configuration.
- ✅ Increased Developer Productivity: Developers could focus on coding instead of managing deployments.
- ✅ Consistent Development & Production Environments: Minimized local and production deployment discrepancies.
Conclusion
By implementing Skaffold, we transformed the client’s Kubernetes deployment workflow, making it more efficient, automated, and developer-friendly. The adoption of Skaffold eliminated manual overhead, reduced errors, and significantly improved the development experience.
📈 Impact at a Glance:
- ⏱️ Build & deploy time reduced by ~60%
- 🚀 Developer feedback loop improved by 70%, enabling faster testing
- ⚙️ Manual deployment errors dropped to nearly 0
- 🔄 CI/CD pipeline integration time reduced by 50%
If your team is struggling with slow Kubernetes deployments, consider integrating Skaffold into your workflow. It’s a lightweight yet powerful tool that simplifies development and deployment, ultimately accelerating your software delivery pipeline.
Thank you for reading!! 🙌🏻😁📃, see you in the next blog.🤘
I hope this article proves beneficial to you. If you have any doubts or suggestions, feel free to mention them in the comment section below or contact us.
The end ✌🏻
References
- Skaffold | Kubernetes Development made easy.
- Kustomize for Kubernetes Efficiency: A Practical Guide.
- CloudForecast Official Documentation.
- Scalable Live Streaming With Kubernetes: The Complete Guide
- How does Karpenter cut Kubernetes costs by 20% and scale them faster?
- How CI/CD Cut Costs & Time for a Leading Chatbot Company?
- Enable Symlink in Tomcat to Secure User Data